Monday, 29 April 2013

Butchered Bouncy Back End

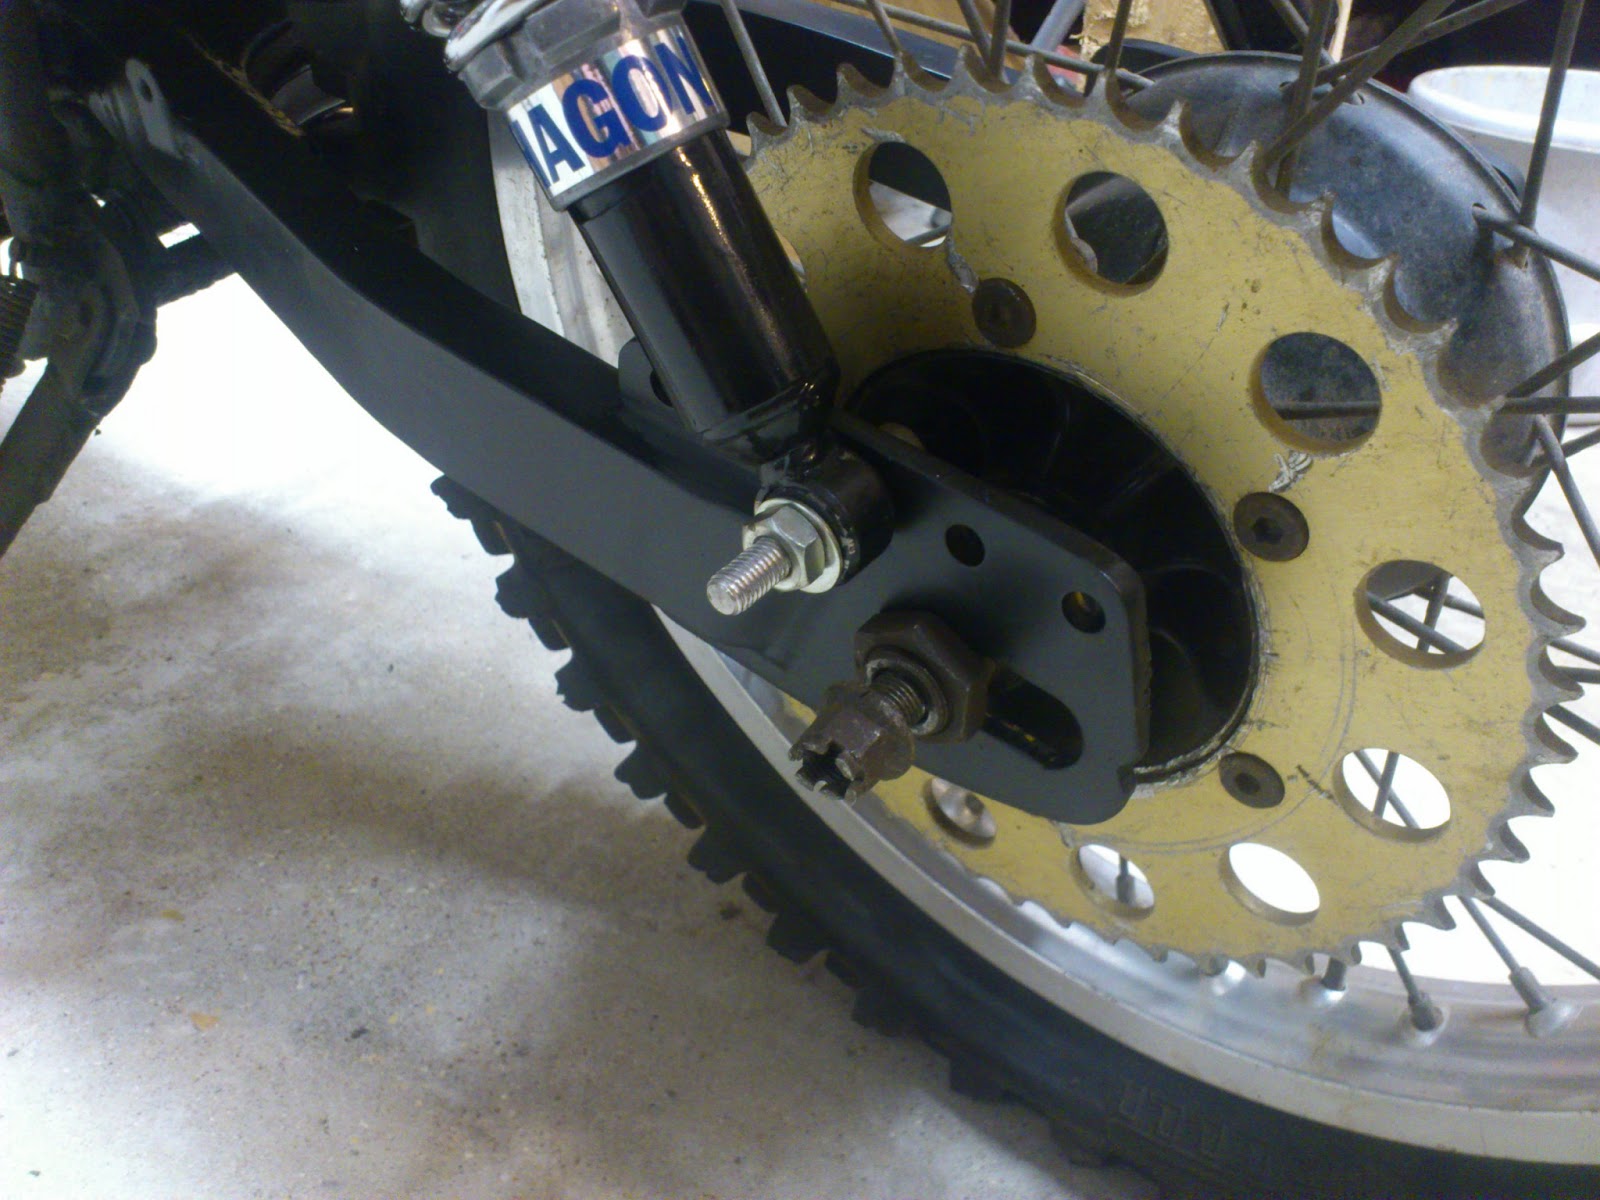
A couple of butchered frame parts by a previous owner, meant that the drive side rear shock mounts were "of concern". The top mount had clearly suffered a crossed thread at some point, and the "fix" had been to screw on a nut 1mm smaller - nice, and it had not even been done very well, and was also cross threaded. Relying on a damaged thread to keep the rear end upright, bouncing and damping as it should was not an option I intended to leave in place. Just to compound the butchering, the lower mount, while still at least of a size the factory intended, had more thread damage, and it's doubtful it would have held any pressure applied by my trusty Britool Torque wrench. Neither of these mounts were designed to be replaced, so whatever I did would mean some more cutting and welding.

A chance spot on Ebay of a pair of good condition, nearly new Hagon shocks, albiet 10mm shorter than the stock shocks, at less than half the cost new gave me an idea! The bike appears to sit a bit low at the rear, compounded by chopping more than 60% of the seat height down, so the opportunity to jack it up a bit was there to be taken.


 OK, the welding looks messy, but there has been good heat transfer and it's solid. 8mm x 30mm bar used to fab the mounts. Measuring the two sides when finished, I'm only 0.4mm out - still annoying - from each side which I doubt will make any difference to the handling, at least none I'll be able to detect.

Now I can deal with the shorter shock, and play with rear ride height. 


Factory option? The wheel is just in there to set the required height for now. Think it will go forward one more. While on the wheel, I'm still not completely happy with the RM wheel, as I may now get it rebuilt, I think I'll lace the rim on the old TS hub, it will save me getting spacers made, and still give me (make use) of the alloy rim.
The upper mount has been simply cut off, and a 10mm hole drilled, through which is a 10mm shoulder bolt for the shock to sit on - no photo yet.

Wednesday, 13 March 2013

Well, I would'nt want to go touring, but.............

Foamsolutions on ebay provided a block of 45mm High Density Closed Cell Foam.

  • Easy to work with. Treat it like a soft wood.
  • Lightweight.
  • Waterproof (not that it matters after its covered)
  • Cheap - under £10 delivered, and enough for two seats)
However, I couldn't recommend it if you intend traveling for any distance. I'm sure I've sat on softer rock!

A couple of hours work, and the "cushion" (really?) is shaped and almost ready. I may rub down the side edges a bit more. I'll walk back into the garage in a couple of days and see what my first thought is. The main cut's were made with a jigsaw, smaller cut's a hacksaw and a sharp knife, and a sanding block finished it off. Every so easy.


Thursday, 7 March 2013

Lunch break fabrication

The seat has a slight kick to clear the rear mudguard (it's taken longer to post this than achieve that) the rear mudguard is also now bolted in the correct hole, moving it back a bit, and a quick cardboard "template" of an idea for the side panel. I can get a "scoop" from ebay, in stainless or ABS plastic (there's also Carbon Fibre, but that's, well a bit excessive and expensive) and the rear frame brace welded in place (my welding is improving, just)


An ABS plastic "scoop" for a few pound's, covering two 38mm holes (to be cut) in the side panel. Form over function.

Wednesday, 6 March 2013

A spare few hours.................

Found some time to cut another seat pan. There's a 50mm wide plate now also welded across the frame seat rails, which I'm simply bolting the pan to (as well as the rear mudguard) which will get photo'd eventually.


Saturday, 2 March 2013

Side Panel

I've been playing around with some sheet alloy, trying to knock up a decent side panel just to tidy up the newly fitted airbox.


My first effort was OK. I had thought about putting some sort of simple "scoop" or possibly a pair of mesh covered Stub Stacks. Then, stupidly, I attacked it with a 6mm drill. That didn't work.

I don't think I've managed to actually fabricate anything yet without at least two attempts. All a good learning curve

When it was on the bike, it just looked wrong.

For the second effort, the hole saw set reared it's head again. That didn't work either. Despite making another template, and cutting out the 38mm holes, which I thought was what I was after, in the metal it was too much.


So, plain it is, for now!


Mmm, what about a small NACA style duct feeding the airbox?

There's a 5mm gap between the airbox and the panel, which is enough space to draw in fresh air, but I still can't help thinking.....................................................................

I found a headlight that I like. It's affordable, made metal, and gives me the look I want. Supplied by a Plant Equipment supplier, as a replacement for a JCB Front Hoe Loader (other makes of loader are available) at under £25, it's a bargain. EBay again!

If anyone's after a "rugged" style front light, give me a shout and I'll send the seller's details.

A simple alloy bracket, bolted onto the lower fork brace will suffice, but it will need another pair of holes drilling next time the forks are stripped down.

I doubt that I'll get any tinkering time for the next two week's or so, but IF I do, now the oil tank is finalized, and I don't need to lift the seat easily to access it, I may have another look at an alloy seat base, bolted straight to the frame rails.

Sunday, 24 February 2013

Battery Box

I stumbled across this on ebay. It was from a 1978 CZ 175 (477). Without asking measurements, I put a 99p bid in and left it. This, if it fit's, would give me a battery box, oil tank and airbox. As the only bidder, it's mine, and even if it goes on the "for future projects" shelf as not suitable (quite a full shelf) at 99p I can't lose, can I?


Breaking it down, the oil tank separates with two hidden bolts, the airbox halves and the inlet cover removed, it was clear it would fit, but with a lot of shaving, grinding and cutting.

Some of the mounting tabs had to go, one at a time, until it squeezed in.


Once in place, I realized the oil tank would not now fit (not to mention a PE250 OE Exhaust I had acquired, which goes over the cylinder head and cross the frame to exit on the opposite side to a TS250, crossing where my new Airbox was sitting) Luckily, the tank just needed moving forward 25mm, easily achieved by re-drilling the mounting holes (the old ones are hidden from view) and I needed to form a bracket to mount the whole lot on the frame.

Frame tidied up


Once the original bracket had been consigned to the scrap box, it was an easy task to cut, from a card template, and weld on some sheet metal.

The new oil tank mount holes needed to be elongated to enable me to slide the tank back, level with the frame


As the original air inlet was not to used, the hole saw came back out of the toolbox.

Holes and mesh = FAST, it just does!


I've now started to make an alloy "side panel" to tidy up one side, but I'm still working on a final design. I'm so tempted on the other side to leave the oil tank as it is, add a bit of patina (cant believe I just said that)


This little exercise has now taken up over 40 man hours - most of which has been putting the airbox in the frame, measuring up, removing, modifying and putting it back in - and with only a few spare hours each week it's dragging on. But, there a light at the end of the tunnel, and I'm happy with it so far.

Sunday, 2 December 2012

Rear Mudguard

It's a fact, ANYTHING with holes drilled in it, AND displaying some alloy mesh is faster, it just IS.
Template quickly made from card, centre and spacing decided, ready to drill.

I still had some Stainless mesh, looked good, at first................
but, Black 3mm Alloy mesh worked better, and a lick of paint!

Having molested the rear guard with a hole saw, found and fitted the size mesh I wanted  I had to get it close to finished. Simoniz Hard Black Satin is my chosen finish, straight out of the rattle can, and, at the moment, that will be the same for everything, bar the wheels and possibly the tank.


Well, I love it (so does my son, which matters) and after a thumbs up from a few mates, I'm chuffed.
The front mudguard is still giving me grief. I've cut a couple of versions from the remainder of the steel trailor guard used on the rear, but without a rolled edge, I'm just not sure. I've got some plastick beading bought to edge the seat pan which I'll play around with. This would also give me a method to fix some mesh under the front as well.


Both the unfinished front guard and the two stroke oil tank are now Hard Black.

and, while I was at it, the stainless mesh has gone from the seat pan, replaced with more 3mm Alloy Mesh

I've also started to fill the small dents on the tank.
Next, back to the exhaust. I've had an idea on how to route it over the cylinder head, which, will look a bit different. Not sure what it will do for gas flow and harmonic's though.